As I said, I will put more info here for the final part of version 4 development. So you can know how many is each 0.1. I hope there are no complaints about putting too many info XD As you'll see I use to making it less boring opening several fronts and doing several simultaneous tests.
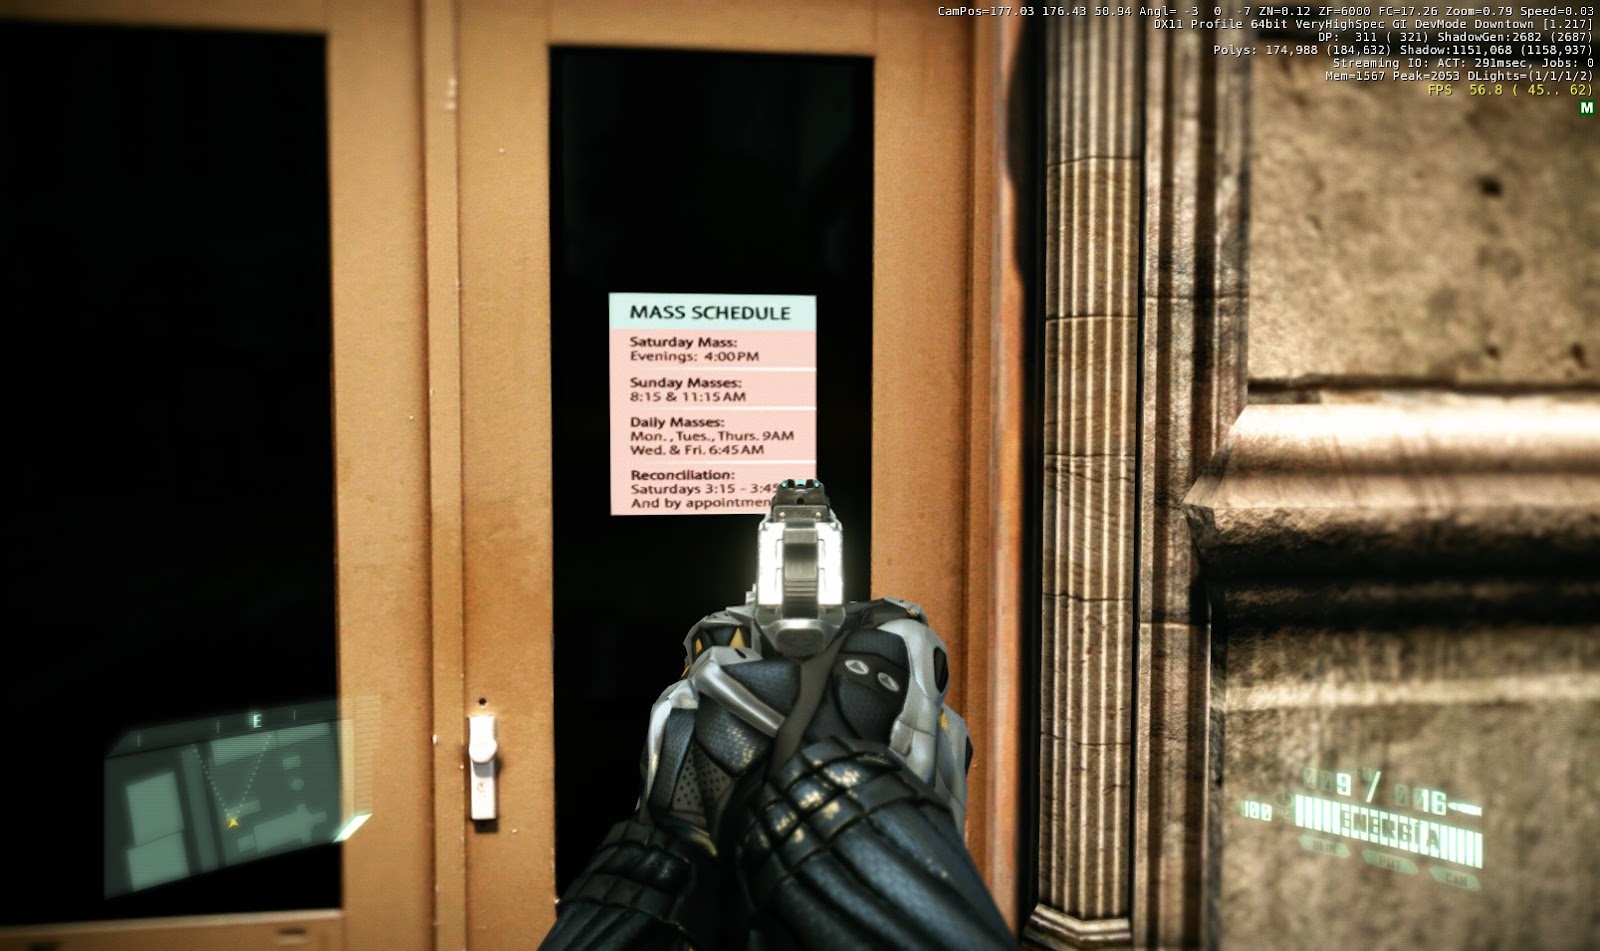
I have a near final version of the textures for the doors of the church. Lack decide whether I get the "mass timetable" into a separate decal to gain some definition in letters without taking up much more memory. As I can make a squared decal I can make it without alpha layer, which would be only 170 KB for a 512x512 resolution, which is far enough for crisp letters. Below you can see the texture of the big and small doors (version with "mass timetable" into the main diffuse). You can notice that the crytek original texture from a real picture preserves a person reflection in the glass. LOL.
For columns of Central Park I had previously done tests using decals. I had take that decision because the ornament is a piece of columns within a texture atlas. An atlas is a big texture that includes smaller textures inside. For example, a texture atlas for texturing a car would be a big picture with the door, front, lights, wheels and steering wheel all crowded together and then use each piece in the share. Using atlas reduce drawcalls. One atlas for diffuse and one for the bumpmapping that could be 10 different textures if you have them independently. You've surely heard of the Rage megatexture as a giant atlas where they put all the textures of the level.
When I want to improve the resolution of a texture that is a portion of an atlas, the first attempt to do using decals (if possible) to paste on the final object without changing the atlas (you can see a perfect example of this on the Warning sign in the Hargreves cryomachine in the last post). This not waste memory multiplying by four the whole atlas that I will not improve. So the first tests were with a decal ornament on the columns. I then added a bump detail layer using my stone bump texture. The problem with it is that it's necessary to paste as many decals as that item is displayed on the map and place them accurately on the surface (and here are 4 ornaments for each column, with dozens of columns). This also triggers the memory, since each decal has its alpha layer for transparency when decal is not a square.
In this case, as Central Park is not a level that has too much variety of textures, I have valued expand the 1024x1024 atlas to 2048x2048 and improve much of the column instead of just the center ornament. The original atlas includes a 1024x1024 alpha layer to use as specular texture. So the atlas has a size of 1.3 MB. If I keep specular texture in the alpha channel, my new 2Kx2K atlas will be 5.4 MB. The first thing then is to get the alpha channel as a separate texture, then I have a 2.7 MB diffuse plus a 680 KB specular. Then I walked around the map looking for lighting conditions, the location of the columns and the low values of specular in the material they use, and concluded that using a 512x512 specular represents no loss in visual quality. So that in the end will be a diffuse atlas of 2.7 MB and a specular atlas of 170 KB.
To make the column first thing I did was look for real pictures of central park columns. Below you can see the two best real pictures I found in google images. From the first I could conclude that there aren't two equal columns in the park, so it was an impossible task to find the original image used for column crytek. So I decided to use the second photo removing the bird's nest, which seemed too quirky element to include it on all columns.
The following is the color change, increase symmetry, eliminate hard shadows, add three layers of dirt and start creating the height map that I will use to make bump map and displacement map (parallax effect). You can see below part of the unfinished process. It's the first test, no bump and no displacement yet.
I also searched photos of leaves to redo the texture of the bushes. In this case, the leaves of the bushes are also part of an atlas that includes textures for various types of vegetation. It is an even worse scenario than columns because these bushes are at all levels. If I decide to improve texture atlas using a new texture to represent only that part, I have to create a new material by changing the tiling values and later assign this material to all the bushes of all levels one by one. A really hard work. In this case, alpha layer can't be extracted, it's required to handle alpha transparency. The only way to reduce size would be using an alpha layer with a single bit of precision. This halves the size of the texture, but generates more obvious aliasing at the edges of the leaves. The final size of the texture can be something like this
Atlas 1024x1024 with full alpha -> 1.3 MB
Atlas HD 2048x2048 with 1bit alpha -> 2.6 MB
Atlas HD 2048x2048 with full alpha -> 5.4 MB
Atlas HD 4096x4096 with 1 bit alpha -> 10.8 MB
Atlas HD 4096x4096 with full alpha -> 21.7 MB
Currently there is no 4096x4096 textures in the whole mod. The only two candidates to use this resolution are the bushes and maple tree leaves. That's why I have left them for last, to test performance in both cases. Screenshots below of individual leaves and some tests using a 2048x2048 with 1 bit alpha (the "worse" option).


Tidak ada komentar:
Posting Komentar